Thursday, September 12, 2013

Making a Splash with Graffiti Style!

During the Exploring Art Journaling Enrichment class I am teaching at my daughter's school this week, I introduced the girls (yes, all girls in the class!) to Splash Inks & Acrylic Inks. (If you missed last week's entry, you can find it here.)
Splash Inks (pictured below) are acrylic mixing colors that are very concentrated & vibrant. They can be mixed to make a huge array of colors without getting muddy. You can paint & illustrate with them & the result is similar to watercolors, but the colors are more pigmented than watercolors & are permanent when dry. (You can read more about them here; buy them here.)
Background made by Sarah
Acrylic Inks (pictured below) are simply a watered down acrylic paint with deep pigments. These inks are gaining popularity in the mixed media world for their drippy effects & ease to illustrate with either using the dropper as a pen or applying ink with a pen nib.
Background made by Kylie
We used a "splatter" technique by dripping/dropping ink onto our substrate (in this case, a piece of recycled cardboard); spraying the page with a little water, seeing the reaction & then blowing the paint around with a straw. I truly love this technique & have even sold a couple of my pieces using it! And watching the girls' reactions as the paint spread around to achieve an unplanned result was awesome!
Here are a couple of the samples I made in class for the girls...
Gesso'd cardboard to Splash Ink art!
Drippy Acrylic Inks
After the girls did their splash art, I showed them how to use stencils & masks to add another layer of dimension to their pages...The Trust Your Heart stencil was THE most popular - go figure! I also mentioned how they could make their own masks with photographs from catalogs & magazines by taping both sides of the page with packing tape & cutting out the image. That's how I got the following images for them to use...
Masks made from catalog photos
The result using the potato sack girls from the catalog images
So, I have rambled on enough...here are the girls' pieces - we didn't have enough time to stencil on all of the pages, but luckily we still have 4 more weeks of class!(Click on an image to enlarge.)
Some of the girls got a little over zealous with the acrylic inks where the colors got a little muddy, BUT I think the results are actually quite beautiful!
Alexis' work
Brenna's work
Brooke's work
Ella's work
Daphne's work
Kylie's work
Paige's work
Sarah's work
Sidney's work
(I also had them do another mark-making page like last week in the hopes of getting stencil images & drips onto those before the hour ended, but maybe next time!)

Next week I will help them to finish up a couple of these pages & then we will start on some collage art! 
Cheers!

Thursday, September 5, 2013

Enriching with Mark Making

This past Tuesday I had the pleasure of beginning an after school Enrichment class with my daughter's schoolmates..."Exploring Art Journaling" with a handful of 2nd-6th graders. It was a complete blast & I can't wait to meet up with these wonderful students over the next 6 weeks!

{For the parents & students from school that might be checking out the post today, I intentionally tried to blur some of the artists names on the photos...see if your child can pick out which image was their creation & tell you about it if they like!}

We began the session by using everyday items & things that most of you would consider trash to make marks on canvas paper...
Old loyalty credit cards, corks, lids, a tomato container, a kids broken flip flop, bubble wrap, broken wheels from a toy...basically anything that will make an interesting mark on the page!

This image is the example I prepared ahead of time:
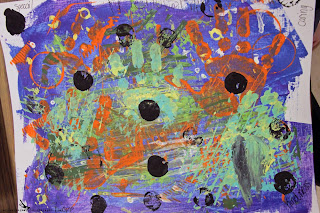
And here is what these aspiring artists created in the beginning:

 Cool texture added to some finger swipes!


Kids really are wonderful artists - not afraid to think outside the box & just create whatever comes to mind!
 The kids had some mini pretzels for a snack & a few dropped them into their paint & used them on their pages - making marks or gluing them on! Above, a student is using some drywall tape to make marks by getting paint on her fingers & then dabbing it on the tape to make dots!
 More pretzel stamping!


Love this hand SK!! It is so much like what my hands can look like at the end of a canvas!
Some kiddos went crazy & embraced the messiness, while others were more methodical...
When the paint was dry, I gave the journal prompt of "Friendship" & asked them write a little about what it means to them, words, names, whatever came to mind.


They may look a little kooky now, but they are actually wonderful starting blocks for the rest of our class!

I showed them that art journaling is a great way to get your feelings down on paper & then cover up what you want with paint by expressing those feelings in marks & colors. Some covered up a little of their writing & others just left it.

Eventually, we will cut these pages in half, use one half as a page in their finished journals & the other half might be cut up for collage work!

I can't wait to show them more fun techniques & get some of more of those feelings down on paper & paint!

See you next week girls!